


Permanent Makeup Needles: How to Choose Cartridges — A Complete Guide for PMU Artists
How to Choose POPU Needles: Recommendations from PMU Master Trainer Marina Matveeva
Marina Matveeva — Permanent Makeup Master Trainer and POPU Ambassador
Marina Matveeva is a permanent makeup expert and master trainer with over 9 years of experience, as well as the author of her own training programs and educational materials for PMU artists.
In her methodology, Marina combines the technical foundations of permanent makeup with the fundamentals of drawing: she teaches artists to understand strokes, light, shadow, and gradients and apply these principles in their practical work. Her original PMU artist training workbook is also based on this approach.
Today, Marina trains permanent makeup artists, runs her own PMU studio, speaks at international professional events, and serves as a judge at permanent makeup championships. These include the WULOP 2025 Final, WULOP Jordan & Palestine, and World Grand Final Cyprus.
Marina collaborates with POPU as a brand ambassador and is also an ambassador for Brovi. This article reflects her professional experience and personal perspective.
In this article, Marina Matveeva explains how to choose needles and cartridges for permanent makeup, using POPU cartridges as an example. Drawing on her own professional practice, she explains how needle configuration, diameter, and taper relate to the chosen technique, skin characteristics, and healed results.

How to Choose Needles and Cartridges for Permanent Makeup
Permanent makeup artists pay close attention to their machine, pigments, and working speed, yet they often make a mistake at the very first stage of choosing needles and cartridges for permanent makeup — they simply reach for the cartridge they are used to working with. One favorite single needle, one go-to three-needle configuration — and then they try to use that same needle for virtually every task.
I start with a different question: WHAT EXACTLY DO I WANT TO ACHIEVE ON THIS SKIN?
The answer determines which needle and cartridge I choose for permanent makeup: the configuration I need, the number of needles in the grouping, and the diameter and taper best suited to the specific task. When making my choice, I consider not only the condition of the skin, but also the treatment area, technique, desired result, and characteristics of the specific cartridge.
Using POPU needles and cartridges as an example, I’ll explain how to read their key specifications and what I look for when choosing a needle for a specific technique and task.

Needle Configurations for Permanent Makeup: RL, RS, and Flat
The first thing I determine when choosing a needle for permanent makeup is which configuration is best suited to the specific task.
Below are the main professional needle and cartridge configuration designations I use to explain the principles behind my selection process. It is important to check the specific range, configurations, and labeling of POPU cartridges against the manufacturer’s technical information.
Needle Configuration | Configuration Characteristics | Applications |
RL — Round Liner | Tightly grouped round configuration | Crisp lines, outlines, controlled strokes |
RS — Round Shader | More loosely grouped round configuration | Soft shading and blending |
F — Flat | Flat configuration | Dense color packing and working over larger areas |
The number of needles in the grouping is also determined by the specific task: sometimes I need a single needle, sometimes a three-needle configuration, and in other cases, a completely different configuration.
How to Read POPU Needle and Cartridge Labeling
The cartridge labeling already provides the artist with some information about the needle specifications. For example, in the current POPU Omni V2 catalog, a 0.25 mm Round Liner is available under the designations 0.25/0801RLLT and 0.25/0801RLMT.
In POPU’s labeling system, code 08 corresponds to a diameter of 0.25 mm, 10 to 0.30 mm, 12 to 0.35 mm, and 14 to 0.40 mm. It is important to check the specific needle configuration and taper against the manufacturer’s full product code.
That is why I do not look at the numbers or letters separately. Instead, I read the entire needle designation to understand exactly which cartridge configuration and specifications I am working with.
But configuration alone is not enough to make the right needle choice for permanent makeup. The next parameter I consider is needle diameter.
Permanent Makeup Needle Diameter: How to Choose the Right Size
When choosing a needle diameter for permanent makeup, I consider the condition and density of the skin, but I do not treat skin type as the only criterion. The treatment area, chosen technique, required density of pigment application, and cartridge configuration also influence my decision.
The POPU needle and cartridge range includes diameters from 0.18 to 0.40 mm. The available diameters vary depending on the specific product line:
0.18 mm — a very fine diameter for tasks that require high precision.
0.20 mm — a fine diameter for detailed work.
0.25 mm — a diameter I often use for delicate techniques and tasks where I need more precise control.
0.30 mm — one of the working diameters I use most frequently across different permanent makeup techniques and treatment areas.
0.35 mm — a larger diameter that I consider in my practice for tasks where I need denser pigment application.
0.40 mm — the largest diameter listed here; I consider it for specific tasks that require denser pigment application.
So, I do not choose a permanent makeup needle diameter in isolation. I consider it together with the cartridge configuration, technique, treatment area, and individual characteristics of the skin.

How to Choose Needle Diameter for Brows and Lips: Examples from My Practice
For hairstroke brows, when I need fine, precise lines, I may choose smaller needle diameters — 0.18–0.20 mm. For powder brows and soft shading, I more often consider 0.25–0.30 mm. In my technique, these diameters allow me to achieve the density and type of shading I am looking for.
When working on lip contours, dense shading, or areas of skin that offer greater resistance, I may use needles with a diameter of 0.30–0.35 mm. I consider 0.35–0.40 mm for tasks that require denser pigment application, such as more saturated color packing or working on denser skin.
As for the POPU cartridge labeling I use in my work:
08 — 0.25 mm
10 — 0.30 mm
12 — 0.35 mm
To illustrate how I approach choosing a needle diameter for permanent makeup, I often use an analogy with fabric.
Imagine that your client’s skin is the material you are working with. If you are working with something as delicate as chiffon — for example, thin eyelid or lip skin — your approach will be one way. With a denser material, more like heavy coat fabric, your approach will be different.
For me, this analogy does not mean that there is one “correct” needle diameter for each skin type. It helps me assess the resistance of the surface and choose the needle and cartridge for permanent makeup in combination with the other working parameters.
I LOOK AT THE SKIN AS THE MATERIAL I AM GOING TO WORK WITH
Needle Taper for Permanent Makeup: ST, MT, HT, LT, and SLT
Needle taper describes the shape and length of the needle’s narrowing toward the tip. When choosing a needle for permanent makeup, I consider the taper together with the diameter, cartridge configuration, and chosen technique.
Taper designations and specifications may vary between manufacturers. Below, I use the taper classification I work with for POPU cartridges.
Before working, it is important to check the technical specifications of the manufacturer’s specific cartridge line.
ST (Short Taper) — a short taper. In my practice, I use it for dense color packing, soft shading, and situations where I do not need a long, sharp taper.
MT (Medium Taper) — a medium taper. In my practice, I use it for a wide range of tasks when I need a balance between precision and needle control.
HT (Half Long Taper) — an intermediate option between a medium and long taper.
LT (Long Taper) — a long taper. In my practice, I choose it for tasks where I need more focused needle contact and high precision, such as fine lines, hairstroke brows, lip contours, and eyeliner.
SLT (Super Long Taper) — an extended taper that I consider for specific tasks requiring particularly precise work.
When choosing a needle taper for permanent makeup, it is important not simply to memorize the ST, MT, HT, LT, and SLT designations. What matters much more is understanding how different tapers feel during a procedure and how I adjust my technique when switching from one taper to another.

And this is where my favorite analogy with women’s shoes comes in.
How to Choose a Needle Taper for Permanent Makeup: LT, MT, and ST in Practice
I use this analogy not as a literal description of what happens in the skin, but as a simple visual way to explain to artists the differences in feel and control between different needle tapers for permanent makeup.
LT (Long Taper) for Me Is a Stiletto Heel
A stiletto heel has a very small contact point. Place it on solid asphalt, and it stands firmly. But put the same stiletto heel on loose ground, and it will start to sink.
In my work, I use this image as a reference: LT feels sharper and more focused at the point of contact. If the skin in the treatment area is firm and elastic, I may choose a Long Taper for fine work — such as hairstrokes, eyeliner, or crisp contours.
If the skin in the treatment area is less firm and more mobile, I find it more difficult to maintain my usual level of control with the same LT. In that situation, I am more likely to consider a different needle taper.
MT (Medium Taper) Is a Stable Block Heel
Continuing the analogy, a block heel is more stable than a stiletto on loose ground. To me, MT feels more controlled and versatile in my work.
That is why, when working with less firm and more mobile skin, I may switch from LT to MT if it gives me better control with the particular technique I am using. However, this does not mean that MT is automatically suitable for this type of skin: I still consider the permanent makeup treatment area, technique, machine, and the specific condition of the skin.
ST (Short Taper) Is a Wide Platform or Wedge Heel
In my practice, when working with visually thin and delicate skin, I may choose a shorter ST (Short Taper) instead of a longer LT (Long Taper) if it gives me better control with the technique I am using.
This is not a rule that says “ST is for thin skin,” but rather one of the needle taper options I may consider depending on the overall working situation.
That is why, for me, there is no single universal answer to the question: “Which needle taper is best for permanent makeup?”
IF YOU CHANGE THE NEEDLE CONFIGURATION OR TAPER, YOU MUST ADJUST YOUR TECHNIQUE
When the needle configuration or taper for permanent makeup changes, I readjust my technique accordingly: hand speed, needle hang, working angle, and number of passes. Below are guidelines based on my own practice.
With LT (Long Taper), I generally work faster and use less needle hang than I do with MT or ST. I determine the specific needle hang based on the machine, cartridge, permanent makeup treatment area, and the particular task.
With MT (Medium Taper), my working pace is usually moderate, and I adjust the needle hang specifically to the machine, cartridge, treatment area, and chosen technique.
When working with ST (Short Taper), I also adjust my pace and needle hang compared with other tapers, tailoring these parameters to the specific task, equipment, and the skin’s response.
The same principle applies to the number of passes: I do not rely on a fixed number, but rather on the skin’s response and the result I am achieving in each individual procedure.
When switching from MT to LT, I may reduce the operating frequency of my permanent makeup machine if the chosen technique and the skin’s response call for it.
Working Angle of the PMU Machine: How It Changes with the Needle and Taper
When I change the needle or taper for permanent makeup, I also adjust the angle of the machine. This is where the heel analogy helps me explain the principle again: we place a stiletto heel almost vertically on a firm surface. If we tilt it too far, it begins to slide.
With LT (Long Taper), I tend to hold the machine closer to a vertical position. With MT (Medium Taper), I may use a more pronounced angle, while with ST (Short Taper), I may adjust it even further depending on the task.
I do not consider the specific working angle of a permanent makeup machine to be a fixed parameter: it depends on the chosen technique, treatment area, machine, cartridge, and the nature of the hand movement.
In my technique, I also control the orientation of the needle module relative to the direction of my hand movement, taking into account the design of the specific cartridge and the manufacturer’s recommendations.
How Membrane Stiffness Affects Needle Selection and Pigment Application
In addition to configuration, diameter, and taper, another parameter that matters in my work is membrane stiffness. Using POPU cartridges as an example, I will explain how it affects the feel of the needle movement and pigment application. I consider the membrane to be part of the cartridge design that influences resistance during needle movement. According to POPU, its cartridges feature a durable “safety membrane” designed to prevent pigment backflow. In practice, I also take membrane stiffness into account when assessing how the cartridge feels and behaves against the resistance of the skin.
Soft membrane. In my experience, a soft membrane can provide a lighter, more delicate feel during needle movement, which I may consider when working with thin or sensitive skin. On very dense or oily skin, however, I may find that the cartridge feels less stable against tissue resistance and that achieving the desired pigment density becomes more difficult. These are practical observations rather than a universal rule, so I assess the result together with the machine settings, needle configuration, technique, and skin response.
Medium membrane. For me, this provides a balance between stability and control. The needle movement feels more stable than with a softer membrane while still allowing me to maintain the level of control I need. This is my primary choice in many situations because, in my technique, it allows me to achieve the desired pigment density while maintaining control throughout the procedure.
Stiff membrane. I may consider a stiffer membrane when the skin offers greater resistance and I need a more stable feel from the cartridge. At the same time, this combination requires particularly careful technique and control. I do not assume that a stiffer membrane will automatically produce denser or more even pigment application, as the final result depends on the entire working setup and the skin’s response.
It is important to remember that the membrane is only one part of the system. The result is also influenced by the machine and its settings, needle configuration and taper, the artist’s technique, the treatment area, the condition of the skin, and the properties of the pigment. My recommendations regarding membrane stiffness are practical guidelines based on my own experience, not universal rules. I always consider these factors together rather than selecting a cartridge based on membrane stiffness alone.

How I Take Membrane Stiffness into Account When Working with Different Skin Types
Thin Skin
Soft membrane: I prefer it for very thin and sensitive skin when I need a particularly gentle needle entry and want to minimize skin trauma.
Medium membrane: On thin skin, it provides a good balance, allowing me to achieve the desired pigment density while maintaining control over the technique. This is an option I consider when I need to control depth without compromising color saturation.
Stiff membrane: I use it with caution. On thin skin, the cartridge may feel more forceful, and with imprecise technique or excessive pressure, there may be a greater risk of unnecessary skin trauma and a more pronounced tissue response.
Dense Skin
Soft membrane: In some cases, it may feel less stable against the resistance of dense skin, and in my experience, achieving the desired pigment density can become more difficult. I generally consider this type of membrane for softer techniques or areas where the skin offers less resistance.
Medium membrane: For me, this is a balanced option. It provides sufficient stability against skin resistance while allowing me to maintain control over pigment application without unnecessarily increasing skin trauma.
Stiff membrane: I may consider it for genuinely dense, resilient skin when I need a more stable feel from the cartridge. In my technique, this can help me achieve the desired pigment density, but it requires precise and confident control.
Oily and Porous Skin
Soft membrane: On very oily skin, I may experience less stability in the needle movement, particularly when the skin also offers significant resistance. I therefore use a soft membrane cautiously in this situation, mainly when the technique calls for a lighter feel and the skin is not overly dense.
Medium membrane: This can be a practical option when the skin is oily but not excessively dense. For me, it provides a useful balance of stability and control over pigment application.
Stiff membrane: I may consider it when the skin is both oily and relatively dense. In my practice, the greater resistance of the membrane can provide a more stable feel when working and help me achieve the pigment density I need.
How Membrane Stiffness Affects My Choice for Different Treatment Areas
Lips: Precise control is especially important in this area, so I never choose membrane stiffness separately from the technique and the condition of the individual client’s lips. For very thin and sensitive lips, I may consider a soft membrane for a gentler feel. A medium membrane is often my working option when I need to balance control with sufficient pigment density. I use a stiff membrane more selectively on denser lip tissue, always paying particularly close attention to technique, pressure, depth, and the skin’s response.
Brows: Skin characteristics can vary considerably in this area. On thinner skin, I may consider a soft membrane for a lighter feel. A medium membrane remains my most versatile option: I may use it for both hairstrokes and powder techniques when it works well with the other parameters of the procedure. On oily or denser skin, I may consider a stiffer membrane when I need a more stable feel from the needle and greater pigment density.
Eyelids: Because the skin in this area is particularly delicate, I pay very close attention to depth control and skin trauma. I generally consider a soft or medium membrane, depending on the technique, equipment, and condition of the skin. I approach stiff membranes with particular caution in this area, as the combination requires especially precise control to avoid excessive trauma.
I choose membrane stiffness primarily according to the resistance of the skin rather than simply relying on what my hand is accustomed to. A medium membrane is my reference point: if I am not achieving the pigment density I need, I may consider a stiffer option; if I see an excessive skin response or trauma, I may consider a softer one. I first test new “machine + cartridge” combinations on latex and synthetic practice skin with different levels of resistance before incorporating them into my work. This helps me understand how a particular combination behaves under different conditions and make a more informed choice for each procedure.
Skin Reactions During Permanent Makeup: When to Reassess Your Working Parameters
You do not always need to wait for complete healing to evaluate how the procedure is progressing: the skin’s reaction during a permanent makeup procedure can already indicate that the parameters being used may need to be reassessed.
If, during the procedure, I notice more bleeding or swelling than expected, or prolonged release of tissue fluid, I take this as a reason to stop and reassess my working parameters.
For me, this is a signal to evaluate not only the chosen needle and cartridge, but also the working depth, speed, number of passes, and permanent makeup machine settings.
After healing, if the pigment has been deposited at an undesirably deep level, its color may visually appear cooler, grayish, or bluish. This change may be associated with the optical scattering of light within the tissue, commonly described in the professional PMU community as the Tyndall effect in permanent makeup.
Important: a change in pigment color after healing cannot be explained solely by the needle diameter or taper. The depth of pigment placement, working technique, properties of the pigment itself, and individual skin characteristics all play a role.
In another situation, an artist may see the opposite: the skin is already showing a pronounced reaction to the procedure, yet the desired pigment density has still not been achieved. For me, this is a reason to reassess the entire combination of working parameters rather than automatically increasing the number of passes.
Additional passes in this situation may place greater stress on the skin without addressing the underlying cause of the problem.
MT (Medium Taper) in Permanent Makeup: A Versatile Taper, but Not for Every Skin Type
I want to discuss MT (Medium Taper) separately because the term “versatile taper” is sometimes interpreted too literally.
When working with visibly thin and delicate skin, including the eyelid area, I pay particularly close attention to my technique when using MT. If the pigment is deposited at an undesirably deep level, its visual color may change after healing.
On denser skin, in my technique, a single pass with MT may sometimes be insufficient to achieve the desired pigment density, but this depends not only on the characteristics of the skin, but also on the permanent makeup machine, chosen technique, and cartridge configuration.
That is why, when choosing a needle taper for permanent makeup, it is important to consider the entire combination of working parameters.
A VERSATILE TAPER DOES NOT MEAN “ONE NEEDLE FOR EVERYONE.”
Permanent Makeup Healing: How to Evaluate the Result After the Procedure
For me, the main criterion is the healed permanent makeup result.
The work may look good immediately after the procedure, but the fresh result cannot provide a definitive indication of how the pigment will look once healing is complete. That is why I evaluate the final result after the permanent makeup has healed.
If the pigment is placed too deeply or the skin is excessively traumatized, the contour may lose some of its original definition after healing. The pigment color may also appear different if it has been deposited at varying depths.
When there is significant skin trauma, recovery may take longer and may be accompanied by a more pronounced skin response. Healing times vary from person to person and depend on the permanent makeup treatment area, technique, skin condition, and aftercare.
After healing, a permanent makeup touch-up may be required. I assess the need for and timing of any follow-up procedure individually once the treated area has recovered.
Examples of Permanent Makeup Brow Work from Marina Matveeva’s Practice Examples of Permanent Makeup Brow Work from Marina Matveeva’s Practice
DO NOT EVALUATE YOUR TECHNIQUE BASED ONLY ON FRESH WORK. THE TRUE RESULT IS HEALED SKIN.
How to Choose the Right Cartridge for Permanent Makeup: What I Check Before the Procedure
Before the procedure, I visually assess the treatment area and gently palpate the skin, paying attention to its density, mobility, and elasticity. For me, this is a practical assessment that helps me choose the right cartridge and permanent makeup technique for the specific task.
If the skin in the treatment area is dense, smooth, and sufficiently firm, I may choose a Long Taper needle when I need fine, precise work.
If the skin in the treatment area is less dense and more mobile, I am more cautious with long tapers and reassess the entire combination of working parameters: the cartridge, needle configuration and taper, technique, and machine settings.
If the skin appears thin, dry, or shows pronounced age-related changes, I do not automatically use the same parameters that I would use on denser, firmer skin.
The more the characteristics of the skin in the treatment area differ from those I usually work with, the less I rely on my standard settings and the more closely I monitor the skin’s response during the permanent makeup procedure.
How to Choose a Permanent Makeup Cartridge: What I Look for First
I CHOOSE THE CARTRIDGE FOR THE SPECIFIC TASK, THEN ADAPT MY TECHNIQUE AND SETTINGS TO THE CARTRIDGE, EQUIPMENT, TREATMENT AREA, AND INDIVIDUAL SKIN CHARACTERISTICS.
For me, this is a fundamental principle when choosing a cartridge for permanent makeup, regardless of the needle configuration, diameter, or taper. If the cartridge itself does not perform consistently, the parameters discussed above will no longer give the artist the level of control needed during the procedure.
That is why I choose POPU cartridges in my own practice: the range offers different needle configurations, diameters, and other specifications for specific tasks, allowing me to adapt my technique according to the system I use in my work. However, the specific labeling and technical specifications of POPU cartridges should always be verified against the manufacturer’s information.

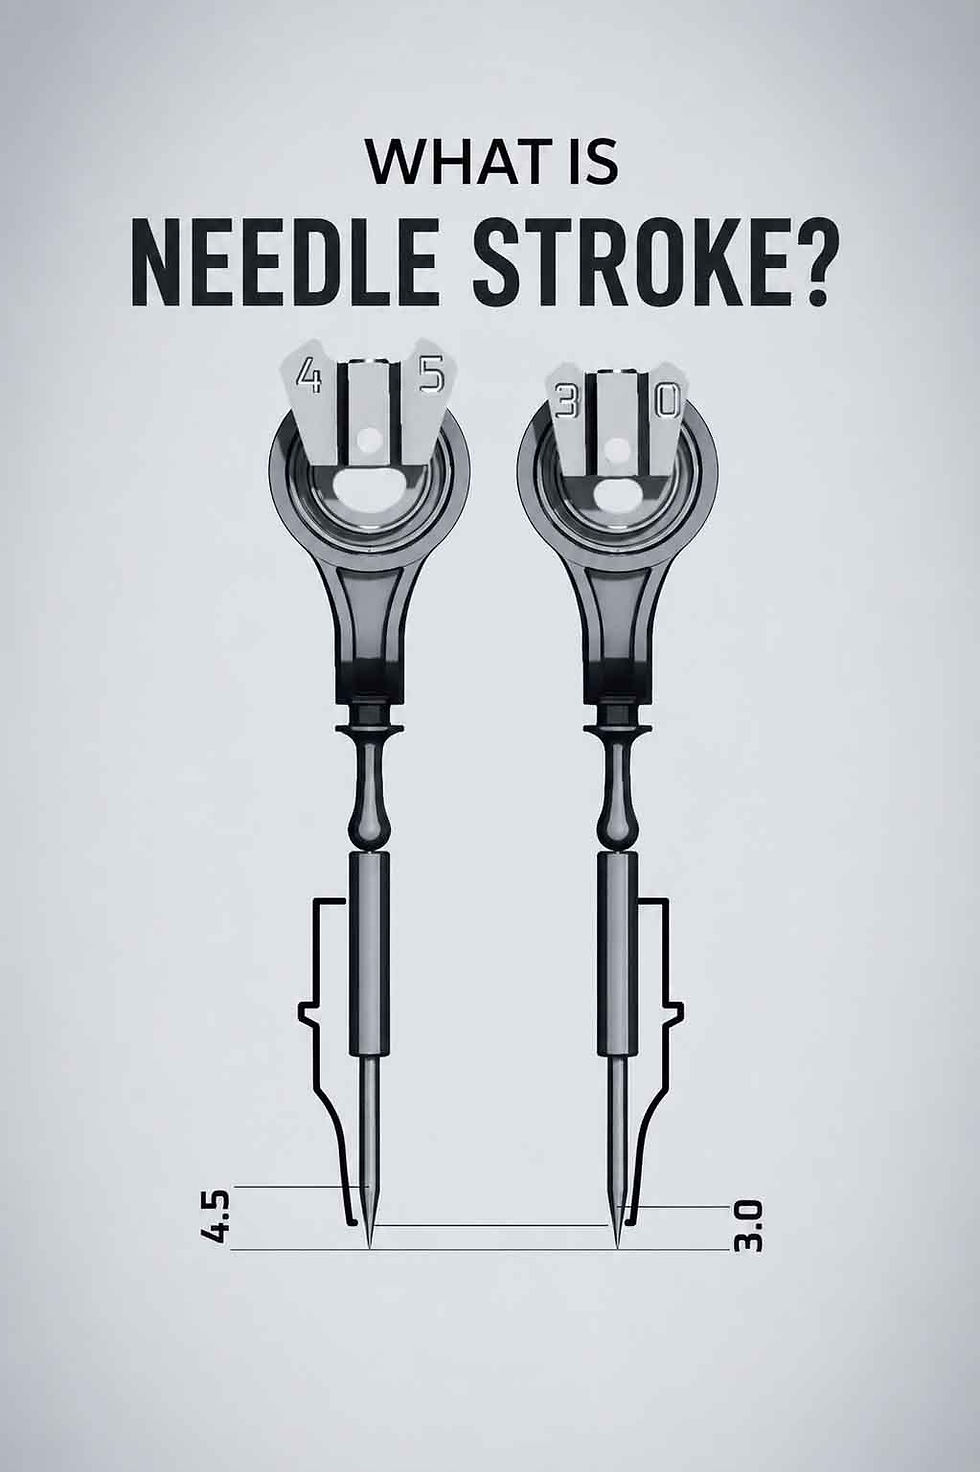
For a deeper understanding of the technical foundations of PMU, you may also find our guides useful: What Is Permanent Makeup? A Modern Understanding of the Procedure explores the modern principles of permanent makeup, the procedure itself, and the factors that influence the final result, while What Is Needle Stroke in Permanent Makeup and Tattooing? Myths, Physics, and the Real Principles Behind Machine Performance takes a closer look at needle stroke, common misconceptions, the physics behind it, and the principles that determine how PMU and tattoo machines actually perform.
The recommendations and working parameters presented in this article are based on my professional experience and are not intended as a universal permanent makeup protocol. Specific machine settings and the choice of needle or cartridge should be adapted by each professional according to the equipment being used, technique, treatment area, individual skin characteristics, and the manufacturer’s recommendations.
This material is intended for qualified permanent makeup professionals and is not a substitute for professional training. All procedures must be performed in accordance with the equipment and cartridge manufacturers’ instructions, as well as applicable hygiene and safety requirements.
Disclaimer: This material is provided for informational and educational purposes and is intended for a professional audience within the permanent makeup industry. The opinions, techniques, and recommendations presented in this article reflect the author’s professional experience and should not be considered universal protocols, medical advice, or official instructions from the PULSE editorial team. The author collaborates with POPU and Brovi as a brand ambassador. References to brands and products are made in the context of her professional experience. Current product specifications, labeling, compatibility, and instructions for use should always be verified against the manufacturer’s official information. The selection of needles and cartridges, equipment settings, and procedure parameters remains the responsibility of the professional, taking into account their qualifications, the individual characteristics of the client and procedure, the manufacturer’s instructions, and applicable safety requirements. This material is not intended to enable individuals without appropriate professional training to perform permanent makeup procedures. In the event of contraindications, unusual reactions, or complications, consultation with a qualified medical professional is required. Publication of this article by PULSE does not constitute an endorsement by the editorial team of the universal applicability of the methods described. Responsibility for their practical application and for professional decisions rests with the practitioner performing the procedure.
#permanentmakeup #pmu #pmuartist #permanentmakeupartist #permanentmakeuptraining #permanentmakeupneedles #pmuneedles #permanentmakeupcartridges #pmucartridges #needlecartridges #pmuneedlecartridges #needlesforpermanentmakeup #needleselection #needleconfiguration #needlediameter #needletaper #cartridgemembrane #pmutechnique #pmuequipment #pmusupplies #permanentmakeupbrows #pmubrows #powderbrows #permanentmakeuplips #pmulips #eyelinerpmu #popu #popupmu #popucartridges #popuomniv2 #marinamatveeva
Publication date: September 30, 2026
By Marina Matveeva


Comments